Why Your Washing Machine Won’t Drain (And Why It Matters)
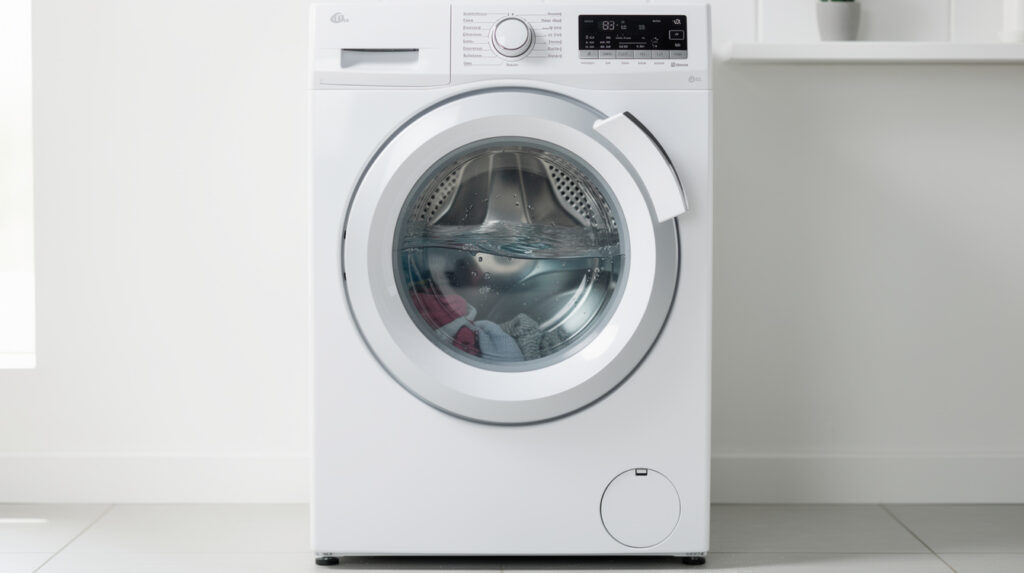
You toss in a load of laundry, press start, and walk away expecting fresh, clean clothes. But when you come back, you find your washing machine sitting in a pool of murky water that refuses to go anywhere. A washing machine that won’t drain is one of the most common — and most frustrating — laundry problems homeowners face.
The good news? In many cases, you can troubleshoot and even fix a washing machine that won’t drain without calling in a professional. In this guide, we’ll walk through the most common causes of drainage problems, step-by-step fixes you can try at home, and signs that it’s time to call in the experts. Let’s get that washer back on track.
Common Causes When a Washing Machine Won’t Drain
Before you start taking anything apart, it helps to understand what might be going on. A washing machine that won’t drain can have several different root causes, ranging from simple blockages to more serious mechanical failures.
1. Clogged Drain Hose
The drain hose is the flexible tube that runs from the back of your washer to the drain pipe in the wall (or a laundry sink). Over time, lint, small clothing items like socks, coins, hair ties, and other debris can accumulate inside this hose, creating a partial or complete blockage.
A kinked or pinched drain hose can also prevent water from flowing freely. If your washer was recently moved or bumped, check behind it to make sure the hose isn’t bent or compressed against the wall.
2. Blocked Drain Pump Filter
Most modern washing machines have a small pump filter (sometimes called a coin trap or debris filter) located at the front bottom of the machine, behind a small access panel. This filter catches small objects before they reach the pump — but if it hasn’t been cleaned in a while, it can get clogged with lint, coins, buttons, and other items.
Cleaning this filter is one of the simplest and most effective fixes for a washer that won’t drain. Many homeowners don’t even know this filter exists, so it often goes years without being cleaned.
3. Faulty Drain Pump
The drain pump is what physically pushes water out of the drum and through the drain hose. If the pump motor has failed, or if the impeller (the small fan-like component inside the pump) is broken or jammed, water won’t be able to exit the machine.
A failing pump often makes unusual noises — a loud humming, buzzing, or grinding sound during the drain cycle is a strong clue that the pump is struggling or has failed entirely.
4. Lid Switch or Door Latch Issues
Top-loading washers have a lid switch that must be engaged for the machine to advance through its cycle, including draining. If the lid switch is faulty, the washer may stop before the drain cycle begins. Similarly, front-loading machines have a door latch mechanism that serves the same purpose.
If your washer fills and agitates but never progresses to the drain and spin cycle, a defective lid switch or door latch could be the culprit.
5. Problems with the Drive Belt
Some washing machines use a drive belt to connect the motor to the drum and the pump. If this belt is worn, stretched, or broken, the pump may not receive enough power to drain the water. You might notice the drum doesn’t spin properly either — if your washing machine won’t spin, a broken drive belt could be causing both the spin and drain problems simultaneously.
6. Drain Pipe or Standpipe Blockage
Sometimes the problem isn’t with your washer at all — it’s with the plumbing it drains into. The standpipe (the vertical pipe in the wall where the drain hose feeds into) can become clogged with lint, soap buildup, or even tree root intrusions over time. If multiple fixtures in your laundry area are draining slowly, the issue is likely in your home’s plumbing rather than the washer itself.
Step-by-Step Troubleshooting Guide
Now that you know the common causes, let’s go through a systematic approach to diagnosing and fixing the problem. Always start with the simplest fixes first — you’d be surprised how often a quick clean-out solves everything.
Step 1: Safety First
Before you do anything, unplug the washing machine from the electrical outlet. If you can’t reach the plug, turn off the circuit breaker that powers the washer. You’ll also want to have towels and a shallow pan or bucket ready, because there’s going to be water involved.
Step 2: Check the Drain Hose
Pull the washer away from the wall carefully and inspect the drain hose. Look for any obvious kinks, bends, or damage. Disconnect the hose from the standpipe and hold it over a bucket — if water rushes out, the hose itself may not be blocked, and the issue could be in the standpipe.
If water doesn’t flow freely, there’s likely a blockage inside the hose. You can try clearing it by running water through it with a garden hose, or by using a long, flexible brush. If the hose is old, cracked, or heavily clogged, replacing it entirely is inexpensive and well worth the effort.
Step 3: Clean the Drain Pump Filter
Locate your washer’s drain pump filter. On front-loading machines, it’s usually behind a small door or panel at the bottom front of the unit. On some top-loaders, you may need to access it from underneath the machine.
- Place towels on the floor and position a shallow container under the filter access.
- Slowly twist the filter cap counterclockwise. Water will begin to flow out — this is normal. Let it drain completely.
- Once the water has drained, fully remove the filter and clean it thoroughly. Remove any lint, coins, hair, or debris.
- Check inside the filter housing for any objects lodged inside.
- Replace the filter, making sure it’s seated properly and tightened.
This simple maintenance task should ideally be done every one to three months to prevent drainage issues from developing in the first place.
Step 4: Inspect the Drain Pump
If cleaning the filter didn’t solve the problem, the drain pump itself may need attention. You’ll typically need to access the pump from the back or bottom of the machine (depending on the model).
With the machine unplugged, look for any visible damage to the pump or its impeller. Try turning the impeller by hand — it should rotate freely. If it’s stuck or feels gritty, debris may be jammed inside. If the impeller blades are broken, the pump will need to be replaced.
You can also test the pump motor with a multimeter for continuity. If the motor shows no continuity, it has failed and needs replacement.
Step 5: Test the Lid Switch or Door Latch
For top-loaders, the lid switch is usually located under the top panel near the door opening. You can test it by pressing the switch manually while running the machine — if the washer starts draining when the switch is pressed, you’ve found your problem.
For front-loaders, check the door latch mechanism to make sure it’s engaging fully. A door that doesn’t close completely can prevent the machine from advancing to the drain cycle.
Step 6: Check the Standpipe
If all the washer components seem fine, try running water directly down the standpipe to see if it drains properly. If water backs up, you have a plumbing issue. You can try using a drain snake to clear the blockage, or call a plumber if the clog is deep in the line.
Preventing Future Drainage Problems
Once you’ve fixed the immediate issue, taking a few preventive steps can save you from dealing with this problem again. Drainage issues in washing machines are largely preventable with regular maintenance.
Clean the Filter Regularly
As mentioned above, cleaning your drain pump filter every one to three months is one of the best things you can do for your washer. It only takes a few minutes and can prevent a whole range of problems.
Check Pockets Before Washing
Coins, keys, tissues, and other small items are some of the biggest offenders when it comes to clogged filters and pumps. Make it a habit to check all pockets before tossing clothes into the washer. A small mesh laundry bag can also be used for items that tend to shed debris, like towels or heavily soiled work clothes.
Use the Right Amount of Detergent
Using too much detergent — especially in high-efficiency (HE) washers — can cause excessive suds that interfere with draining. Over time, detergent residue can also build up inside the drain hose and pump filter, contributing to clogs. Always follow the manufacturer’s recommended detergent amount, and consider using HE-specific detergent if your washer requires it.
Excess detergent buildup can also lead to unpleasant smells. If you’ve noticed a musty odor coming from your washer, check out our guide on how to get rid of washing machine odor for effective solutions.
Inspect the Drain Hose Periodically
Every few months, pull the washer out slightly and check the drain hose for kinks, cracks, or buildup. Make sure the hose isn’t pushed too far into the standpipe, which can create a siphon effect. The hose should extend about six to eight inches into the standpipe for proper drainage.
Run a Monthly Cleaning Cycle
Most modern washers have a dedicated cleaning cycle. Running it once a month with a washing machine cleaner or a cup of white vinegar helps prevent residue buildup inside the drum, hoses, and pump.
When a Washer Won’t Drain Can Cause Bigger Problems
A washing machine that won’t drain isn’t just an inconvenience — it can lead to more serious issues if left unaddressed. Standing water inside the drum creates a breeding ground for mold and mildew, which can damage your clothes and cause health problems.
More importantly, a drainage problem can sometimes lead to water overflow. If water backs up and spills out of the machine, it can damage your flooring, walls, and anything stored nearby. Laundry room flooding is a real concern, and learning how to prevent washing machine flooding should be a priority for every homeowner.
Water damage from a malfunctioning washer can be expensive to repair — far more costly than fixing the drainage issue itself. If you notice water pooling around your washer or an unusual amount of water remaining in the drum after a cycle, address it promptly.
Top-Loading vs. Front-Loading Drainage Differences
It’s worth noting that top-loading and front-loading washing machines handle drainage a bit differently, and understanding these differences can help you troubleshoot more effectively.
Top-Loading Washers
Traditional top-loading washers use gravity more heavily in the drainage process. The drain pump still does most of the work, but the water has a natural downward path. Top-loaders are also more prone to lid switch issues, which can halt the drain cycle entirely.
Top-loaders also tend to be more forgiving when it comes to drain hose positioning, since the drain outlet is typically near the bottom of the machine.
Front-Loading Washers
Front-loaders are more dependent on the drain pump because the drum is oriented horizontally. These machines typically have an easily accessible drain pump filter at the front bottom, making regular cleaning more convenient.
However, front-loaders are more susceptible to door seal issues. The rubber gasket around the door can trap water, lint, and debris, which can eventually contribute to drainage problems if not cleaned regularly.
How to Manually Drain a Washing Machine
If your washer is full of water and you need to deal with it before you can troubleshoot, here’s how to manually drain it.
Method 1: Use the Drain Filter
If your machine has a front-accessible drain pump filter, you can drain the water through it. Place a large, shallow container under the filter and slowly open it. Be prepared — a full load of water is a lot of water. You may need to open and close the filter several times to drain it in batches.
Method 2: Use the Drain Hose
Disconnect the drain hose from the standpipe and lower it into a bucket placed on the floor. Gravity will draw the water out. Again, have plenty of towels ready and drain into multiple buckets if needed.
Method 3: Bail It Out
For top-loaders, the simplest (if least elegant) method is to scoop the water out with a container and pour it into a bucket or sink. Once the water level is low enough, you can soak up the rest with towels.
When to Call a Professional
While many washing machine drainage problems can be solved with DIY troubleshooting, there are times when it’s best to bring in a professional appliance repair technician.
- The drain pump motor has failed: Replacing a drain pump requires disassembling part of the machine and working with electrical connections. If you’re not comfortable with this level of repair, it’s best handled by a pro.
- You hear grinding or burning smells: These can indicate a seized pump motor or an electrical issue. Continuing to run the machine could cause further damage.
- The control board is malfunctioning: If the washer isn’t sending the signal to start the drain cycle, the electronic control board may be at fault. This is a complex repair that usually requires professional diagnosis.
- You’ve tried everything and the washer still won’t drain: If you’ve cleaned the filter, checked the hose, verified the pump, and tested the lid switch with no improvement, there may be an issue that’s not immediately visible.
- Water damage has occurred: If your washer has overflowed or leaked significantly, you may need both appliance repair and water damage remediation.
If you’re in the Vancouver area and need help diagnosing or repairing a washer drainage issue, Tech Angels can help. Our experienced technicians have seen it all when it comes to washing machine problems, and we can usually get your machine draining properly in a single visit.
Cost of Repairing a Washing Machine That Won’t Drain
The cost of fixing a drainage problem varies widely depending on the cause. Here’s a general breakdown of what you might expect:
- Clogged filter or hose cleaning: Free if you do it yourself. A service call for this simple fix typically runs $80 to $150.
- Drain hose replacement: $20 to $40 for the part if you DIY. Professional replacement typically costs $100 to $200 including labor.
- Drain pump replacement: The pump itself costs $50 to $150 depending on the brand. With professional installation, expect $150 to $350 total.
- Lid switch or door latch replacement: Parts cost $20 to $70. Professional repair typically runs $100 to $250.
- Control board replacement: This is the priciest repair, with parts ranging from $150 to $400 and total repair costs of $250 to $550.
In most cases, repairing a washing machine that won’t drain is significantly cheaper than replacing the entire unit. However, if your washer is more than 10 years old and requires an expensive repair, it might be worth considering a replacement instead.
Final Thoughts
A washing machine that won’t drain is a problem that’s hard to ignore — and you shouldn’t. Left unaddressed, it can lead to mold growth, unpleasant odors, and even water damage to your home. The good news is that many drainage issues are caused by simple blockages that you can clear yourself with basic tools and a little patience.
Start with the basics: check the drain hose for kinks, clean the pump filter, and make sure the standpipe isn’t blocked. If those steps don’t solve the problem, inspect the pump, lid switch, and drive belt. And if you’re still stuck, don’t hesitate to call in a professional — some issues are best handled by someone with the right tools and experience.
Regular maintenance goes a long way in preventing drainage problems. Clean your pump filter monthly, check pockets before washing, use the right amount of detergent, and run a cleaning cycle regularly. Your washing machine works hard for you — a little care will keep it running smoothly for years to come.