The Filter You Probably Forgot About
If you have owned a washing machine for years and never cleaned the pump filter, you are not alone. Most homeowners do not even know their washing machine has a filter, let alone that it needs regular cleaning. But this small, often hidden component plays a big role in keeping your washer running properly, your clothes coming out clean, and your laundry room smelling fresh.
The washing machine pump filter — sometimes called a drain filter, debris filter, or coin trap — catches small objects and debris before they reach the drain pump. Without it, coins, buttons, hair ties, pet hair, lint, and other small items would flow directly into the pump and drain hose, causing clogs, pump damage, and drainage failures.
If you have noticed your washing machine draining slowly, leaving standing water at the end of a cycle, producing a foul odor, or displaying an error code related to drainage, the pump filter is one of the first things you should check. Here in Vancouver, where many households run their washers frequently due to our active, outdoor lifestyles, filter maintenance is especially important.
Where Is the Washing Machine Pump Filter?
The location of the pump filter depends on whether you have a front-loading or top-loading washing machine, and the specific brand and model you own.
Front-Load Washing Machines
Front-load washers almost always have an accessible pump filter. It is typically located at the bottom front of the machine, behind a small access panel or door. Look for a rectangular panel at the very bottom of the front face of your washer — it usually pops off when you press on it or can be pried open with a flathead screwdriver or coin. Behind this panel, you will see a round cap or dial that unscrews to reveal the filter.
Some front-load models also have a small drain hose next to the filter cap. This hose allows you to drain residual water from the machine before removing the filter, which is very helpful for minimizing mess.
Top-Load Washing Machines
Top-load washers are more varied in their filter setups. Many modern top-load washers with an agitator have a lint filter inside the agitator itself — it is a small mesh screen that fits into the top of the agitator barrel. Some top-load models have a filter along the top rim of the wash drum, while others have a self-cleaning filter system with no user-accessible filter at all.
High-efficiency (HE) top-load washers without an agitator often have a pump filter similar to front-load machines, usually accessible from the front bottom panel. Check your owner’s manual to determine the exact location for your model.
Why Does the Pump Filter Get Clogged?
Every time you run a load of laundry, small particles and objects wash off your clothes and into the wash water. The pump filter catches these before they can reach the drain pump. Over time, the filter accumulates:
- Lint and fabric fibers: Every wash cycle releases tiny fibers from clothing, towels, and bedding.
- Pet hair: If you have dogs or cats, their hair ends up on your clothes and then in the filter. This is one of the biggest contributors to filter clogs in pet-owning households.
- Coins and small metal objects: Coins left in pockets are one of the most common items found in pump filters. Paperclips, screws, and nails also show up frequently.
- Hair ties and bobby pins: These small items slip through pockets and off clothing regularly.
- Tissue and paper: Forgotten tissues in pockets dissolve into a pulpy mess that clogs the filter.
- Sand and dirt: Vancouver’s proximity to beaches and outdoor recreation means sand, dirt, and gravel regularly make it into the wash.
- Small clothing items: Baby socks, underwear, and other small garments can sometimes slip past the drum and end up in the filter or pump area.
Signs Your Washing Machine Pump Filter Needs Cleaning
Your washing machine will give you several signals when the pump filter is getting clogged. Watch for these warning signs:
Slow Draining or Standing Water
If water remains in the drum at the end of a wash cycle, or if the machine takes much longer than usual to drain, a clogged filter is the most common cause. The filter restricts water flow to the drain pump, slowing everything down.
Foul Odor
A dirty pump filter is one of the top causes of washing machine odor. The combination of moisture, lint, and trapped organic debris creates the perfect environment for mold and bacteria to thrive. If your washer has a persistent musty or sour smell that does not go away even after running a cleaning cycle, the filter is likely the source.
Error Codes
Many modern washers will display an error code when the drain pump cannot move water efficiently. Common drainage-related error codes include F21, F5E2, OE, 5E, and E21, depending on the brand. Check your owner’s manual to see if the error code you are seeing relates to drainage.
Clothes Come Out Still Wet
If the machine cannot drain water completely before the spin cycle, your clothes will come out much wetter than usual. This is different from a spin cycle problem — if you see standing water in the drum, the issue is drainage, not spinning.
Unusual Noises During Draining
A clogged filter can cause the drain pump to work harder and produce unusual sounds — grinding, humming, or buzzing noises during the drain portion of the cycle. These sounds indicate the pump is straining against the restriction.
How to Clean a Front-Load Washing Machine Pump Filter
Cleaning the pump filter on a front-load washer is a straightforward process that takes about 15 to 20 minutes. Here is how to do it:
What You Will Need
- Towels — several old towels or rags for catching water
- A shallow pan, baking sheet, or plastic container to catch water
- A soft brush or old toothbrush
- Warm water for rinsing
- Pliers (optional, if the filter cap is stuck)
Step 1: Prepare for Water
This is the most important step, and it is the one that catches most first-timers off guard. There is almost always standing water behind the filter, and it will come out when you open it. Lay several towels on the floor in front of the washer and position your shallow pan directly under the filter access panel.
Step 2: Open the Access Panel
Locate the small door or panel at the bottom front of your washer. Pop it open by pressing on it, pulling a tab, or gently prying it with a flathead screwdriver. Behind the panel, you will see the filter cap and possibly a small drain hose.
Step 3: Drain Residual Water
If your model has a small drain hose next to the filter cap, pull the hose out and remove its plug or cap. Let the water drain into your pan. This can be a surprising amount of water — sometimes several cups — so have extra towels ready and empty the pan as needed.
If there is no drain hose, you will need to open the filter cap slowly and let the water trickle out into your pan. Turn the cap just a quarter turn to start the flow, wait for it to slow, then continue turning until the cap comes all the way off.
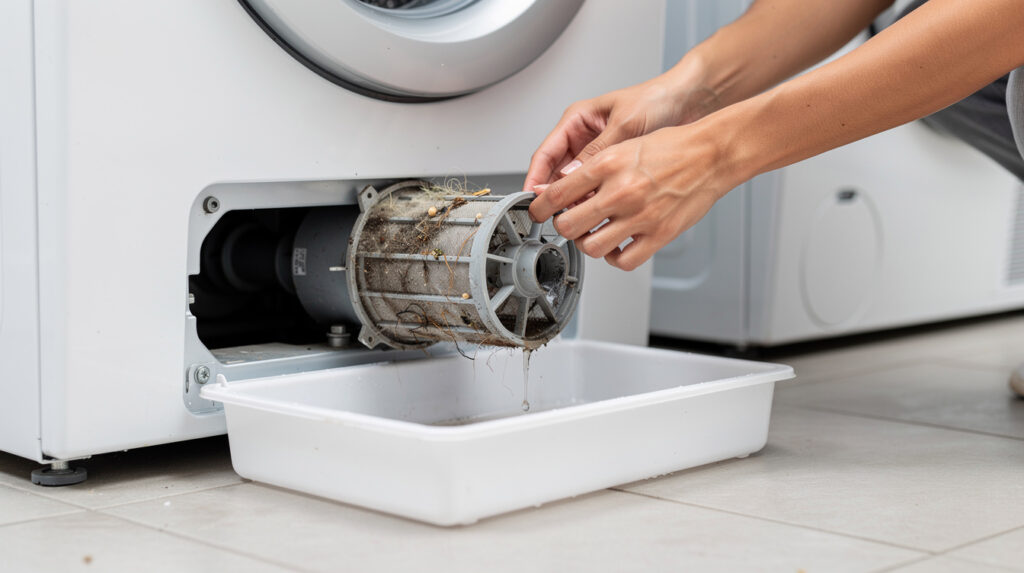
Step 4: Remove the Filter
Twist the filter cap counterclockwise and pull it out. The filter itself is usually attached to the cap — it comes out as one piece. Be prepared for what you find inside. It is common to discover a matted collection of lint, hair, coins, buttons, and other debris. Some people find socks, hair ties, or even small toys that have been missing for months.
Step 5: Clean the Filter
Remove all debris from the filter by hand. Then rinse the filter under warm running water, using a soft brush or toothbrush to scrub away any remaining residue. Pay attention to the mesh screen or perforated holes — make sure they are completely clear so water can flow through freely.
Step 6: Clean Inside the Filter Housing
Before reinserting the filter, shine a flashlight into the filter housing inside the washer. Look for any debris, coins, or objects that may have fallen past the filter and could damage the pump impeller. Wipe the inside of the housing with a damp cloth. Check that the pump impeller (the small propeller-like component visible inside the housing) can spin freely — you can gently turn it with your finger.
Step 7: Reinstall the Filter
Push the filter back into the housing and twist it clockwise until it is fully seated and snug. Do not overtighten, but make sure it is secure — a loose filter will leak water onto your floor every time the machine drains. Close the access panel.
Step 8: Run a Test Cycle
Run a short rinse-and-spin cycle with no clothes to verify that the machine drains properly and there are no leaks from the filter area.
How to Clean a Top-Load Washing Machine Filter
The process for top-load machines varies more depending on the filter type and location.
Agitator Lint Filter
If your top-load washer has a lint filter inside the agitator, remove the top cover of the agitator (it usually twists or pops off). Pull out the lint screen and peel off the accumulated lint. Rinse the screen under warm water and replace it. This should be done every month or so.
Rim or Edge Filters
Some top-load models have mesh filters along the top rim of the wash drum. These are usually removable — they slide or snap out of their channels. Clean them by rinsing under water and brushing off lint and debris, then snap them back into place.
Bottom-Access Pump Filter
If your top-load HE washer has a pump filter accessible from the bottom front, follow the same steps outlined for front-load machines above.
How Often Should You Clean the Pump Filter?
Most manufacturers recommend cleaning the washing machine pump filter every one to three months, depending on usage. Here are some guidelines to help you determine the right schedule for your household:
- Every month: If you run more than seven loads per week, have pets, or frequently wash items with heavy lint (towels, blankets, fleece).
- Every two months: For average households running four to seven loads per week.
- Every three months: For light usage — singles or couples running fewer than four loads per week.
- Immediately: Whenever you notice slow draining, bad odor, error codes, or any of the other warning signs listed above.
Add filter cleaning to your regular home maintenance routine. Many Vancouver homeowners find it convenient to clean the washer filter at the same time they run a washer cleaning cycle — combining two maintenance tasks into one session.
What You Might Find Inside the Filter
Part of the fun — or perhaps the horror — of cleaning your washing machine pump filter for the first time is discovering what has been collecting in there. Here are some of the most common items appliance technicians and homeowners find:
- Coins — sometimes enough to buy a coffee
- Bobby pins and hair clips
- Hair ties and elastic bands
- Baby socks and small garments
- Tissues and paper scraps
- Buttons and beads
- Pet hair — sometimes entire clumps
- Sand and gravel
- LEGO pieces and small toys
- Keys and USB drives
- Toothpicks and dental floss
The takeaway: always check pockets before loading the wash. It takes a few seconds and saves you from clogs, pump damage, and the occasional lost item mystery.
What Happens If You Never Clean the Filter?
Ignoring the washing machine pump filter does not just lead to slow draining and bad smells. Over time, a severely clogged filter can cause real damage to your washing machine:
- Drain pump failure: When the pump has to work against a heavily clogged filter, it overheats and can burn out. Replacing a drain pump is a significantly more expensive repair than simply cleaning a filter.
- Water damage: A washer that cannot drain properly may overflow or leak, potentially damaging your floors and the area around the machine.
- Mold growth: Standing water and trapped organic matter create ideal conditions for mold, which can spread to the drum and gasket and cause health concerns.
- Reduced wash quality: A machine that cannot drain and rinse efficiently will not clean your clothes as well, defeating the entire purpose of the appliance.
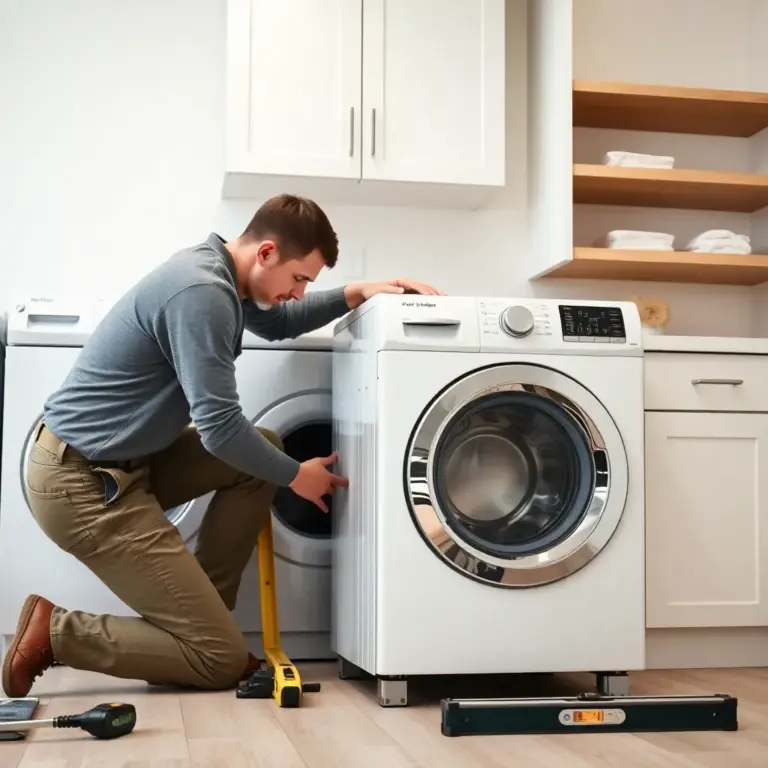
When to Call a Professional
Cleaning the pump filter is a maintenance task most homeowners can handle. However, there are situations where professional help is appropriate:
- The filter will not come out: If the filter cap is seized, cross-threaded, or will not turn despite reasonable effort, forcing it can cause damage. A technician has the tools and experience to remove stuck filters safely.
- Cleaning the filter does not fix the drainage problem: If you have cleaned the filter thoroughly and the machine still drains slowly or not at all, the clog may be deeper in the drain hose, the pump itself, or your home’s drain plumbing.
- The pump makes grinding noises even with a clean filter: This can indicate a damaged pump impeller or a foreign object lodged inside the pump housing past the filter.
- You see water leaking from the filter area after cleaning: A damaged filter gasket, a cracked filter housing, or an improperly seated filter can all cause leaks that need professional attention.
The appliance repair team at Tech Angels in Vancouver has extensive experience with all major washer brands and can quickly diagnose and resolve drainage issues that go beyond a simple filter cleaning.
Keep Your Washer Running Smoothly
Cleaning your washing machine pump filter is one of the simplest, quickest, and most impactful maintenance tasks you can do for your washing machine. It takes less than 20 minutes, requires no special tools, and can prevent expensive repairs, unpleasant odors, and poor wash performance.
Make it part of your regular household maintenance routine, and your washing machine will reward you with years of reliable, efficient service. Your clothes — and your nose — will thank you.
Related Articles
Explore more appliance care tips from the Tech Angels blog: