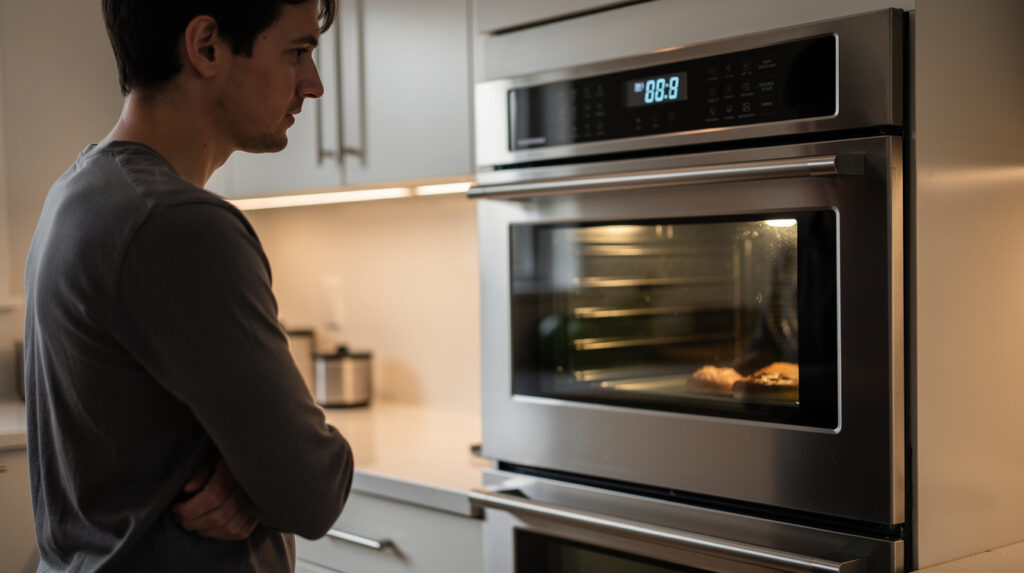
When Preheating Takes Longer Than the Recipe
You set your oven to 375 degrees, start prepping your ingredients, and twenty minutes later the oven still has not reached temperature. What used to take ten minutes now seems to take twice as long, and your cooking schedule is thrown off. A slow oven preheat is more than an inconvenience; it can affect your cooking results, waste energy, and signal that something in your oven needs attention.
Before you start shopping for a new oven, know that most preheat problems are caused by specific, identifiable issues that are often fixable. Some you can troubleshoot and resolve yourself, while others may require professional diagnosis. Either way, understanding what is happening inside your oven is the first step toward getting it back to normal performance.
In this guide, we will cover everything from normal preheat times to the most common culprits behind a slow oven, and help you determine whether you are dealing with a simple fix or a repair that needs a technician.
What Is a Normal Oven Preheat Time
Before troubleshooting, it helps to know what normal looks like. Preheat times vary depending on the type of oven, the target temperature, and even the oven’s age.
Electric Ovens
A typical electric oven should preheat to 350 degrees Fahrenheit in about 12 to 15 minutes. Higher temperatures like 425 or 450 degrees will take correspondingly longer, usually 15 to 20 minutes. Newer ovens with more powerful heating elements tend to preheat faster, while older models may be a bit slower even when working perfectly.
Gas Ovens
Gas ovens generally preheat faster than electric ovens because the gas burner produces heat more immediately than an electric element. A gas oven in good working order should reach 350 degrees in about 7 to 12 minutes. However, gas ovens can be more susceptible to igniter problems, which we will discuss shortly.
Convection Ovens
Convection ovens, which use a fan to circulate hot air, tend to preheat faster than conventional ovens because the air circulation distributes heat more efficiently. If your oven has a convection setting, you may notice that preheating with convection on is noticeably quicker.
When to Be Concerned
If your oven is taking more than 20 to 25 minutes to reach 350 degrees, something is likely wrong. Also pay attention to whether the preheat time has gradually increased over weeks or months, as this suggests progressive deterioration of a component. A sudden dramatic increase in preheat time points to a component that has failed rather than one that is slowly wearing out.
Common Causes of Slow Oven Preheat
Let us look at the most likely reasons your oven is taking too long to heat up, starting with the most common and easy-to-check issues.
Heating Element Problems (Electric Ovens)
Electric ovens have two heating elements: one on the bottom (the bake element) and one at the top (the broil element). During preheating, the bake element does most of the work. If this element is failing, it will produce less heat, and the oven will take much longer to reach the target temperature.
You can visually inspect the bake element while the oven is preheating. Turn the oven on and look through the window or carefully open the door slightly. A properly functioning element should glow an even, bright orange-red across its entire length. If you see areas that are not glowing, spots that appear brighter than others, or visible cracks, blisters, or breaks in the element, it is failing and needs replacement.
A completely failed element will not glow at all, and the oven will not heat from the bottom (though the broil element at the top may still work). A partially failed element will glow unevenly and produce reduced heat, resulting in slow preheating and uneven cooking.
Replacing a bake element is one of the more straightforward oven repairs. The element is usually secured with two screws at the back wall of the oven and connects to the wiring with push-on connectors. Replacement elements are available for most oven models and typically cost between twenty and sixty dollars.
Weak or Failing Igniter (Gas Ovens)
In a gas oven, the igniter serves two functions: it opens the gas valve and it ignites the gas. The igniter is an electrically heated component that needs to reach a specific temperature before the gas valve will open. As igniters age, they weaken and take longer to reach that critical temperature, which means a longer delay before the gas starts flowing and the oven begins heating.
A healthy igniter should glow and ignite the gas within 30 to 90 seconds of the oven being turned on. If the igniter glows for more than 90 seconds before the gas lights, or if the gas does not light at all (the igniter glows but the burner never fires), the igniter is likely too weak and needs replacement.
You can observe the igniter by removing the bottom panel inside the oven (it usually lifts out) and looking at the igniter at the back of the burner assembly. When you turn the oven on, watch the igniter glow. A strong igniter glows bright orange quickly. A weak one glows more dimly and takes noticeably longer to brighten.
Igniter replacement is a common repair for gas ovens and is the most frequent cause of slow oven preheat in gas models. The part itself is usually twenty to fifty dollars, and the replacement process involves removing a few screws and disconnecting a wire connector.
Faulty Temperature Sensor
Your oven uses a temperature sensor (also called an oven sensor or RTD sensor) to monitor the internal temperature and communicate it to the control board. The control board uses this information to regulate the heating element or gas burner, turning it on and off to maintain the set temperature.
If the temperature sensor is reading incorrectly, telling the control board that the oven is hotter than it actually is, the control board will cycle the heating element off too early and too frequently, resulting in slow preheating and an oven that never quite reaches the right temperature.
The temperature sensor is a thin metal probe, usually located at the top back wall of the oven interior. You can test it with a multimeter if you are comfortable with basic electrical testing. At room temperature, most oven sensors should read around 1,080 to 1,100 ohms of resistance. A reading significantly different from this range suggests a faulty sensor.
Replacement sensors are inexpensive (usually fifteen to thirty dollars) and relatively easy to install, typically requiring only a single screw and a wiring connector.
Oven Calibration Issues
Over time, the temperature calibration of your oven can drift, meaning the actual temperature inside the oven does not match what is shown on the display or dial. This does not directly cause slow preheating, but it can make it seem like the oven is taking longer because it is heating to a different temperature than what you set.
You can test calibration by placing an oven thermometer (available at any kitchen supply store) inside the oven and comparing its reading to the set temperature. Some variation (plus or minus 25 degrees) is normal, but a larger discrepancy means the oven needs recalibration.
Many ovens have a calibration adjustment in the settings menu or accessible through a procedure described in the owner’s manual. This allows you to offset the temperature reading so that the set temperature matches the actual temperature. Check your manual for specific instructions for your model.
Insulation Degradation
Your oven is insulated to keep heat inside the cooking cavity and prevent it from escaping into your kitchen. Over years of use, this insulation can settle, compress, or deteriorate, allowing heat to escape more quickly. This means the oven has to work harder to maintain temperature and takes longer to preheat.
Signs of insulation problems include the exterior of the oven feeling unusually hot during operation, the kitchen heating up more than usual when the oven is on, and the oven cycling the heating element on more frequently than it used to. Unfortunately, insulation issues are not easy to diagnose or repair at home and typically require professional assessment.
Door Seal or Gasket Issues
The gasket around the oven door creates a seal that keeps hot air inside. If this gasket is worn, torn, compressed, or missing in spots, hot air leaks out during preheating and operation. This forces the oven to work harder to reach and maintain temperature.
Inspect the gasket by running your hand along the edge of the closed oven door (without touching the door itself, as it may be hot). If you feel warm air escaping, the gasket is not sealing properly. You can also visually inspect the gasket for tears, gaps, or areas where it has pulled away from the door frame.
Oven door gaskets are replaceable and are specific to your oven model. Some press into a channel around the door, while others are attached with clips or adhesive. This is generally a straightforward DIY repair.
Blocked or Dirty Oven Vents
Ovens have vent openings that allow moisture and excess heat to escape during operation. These vents are typically located at the back of the cooktop surface or under one of the rear burners on a range. If the vents are blocked by foil, pans, or debris, the oven cannot circulate air properly, which can affect both preheating performance and cooking results.
Never cover oven vents with foil or other materials, even if you are trying to catch drips. Check that the vent openings are clear and unobstructed.
Control Board Malfunction
The electronic control board manages all oven functions, including temperature regulation during preheating. A failing control board can send incorrect signals to the heating element or gas valve, resulting in inconsistent heating, slow preheating, or temperature regulation problems.
Control board issues are the hardest to diagnose at home and the most expensive to repair. If you have ruled out the more common causes listed above and the oven still preheats slowly, a control board malfunction is worth investigating with the help of a qualified technician.
Troubleshooting Your Slow Oven Preheat
Work through these steps systematically to identify the cause of your slow preheating.
Step 1: Time the Preheat
Set your oven to 350 degrees and time how long it takes to signal that it has reached temperature. Also place an oven thermometer inside to verify the actual temperature when the oven signals “ready.” This gives you a baseline and tells you whether the oven is actually slow to heat or just miscalibrated.
Step 2: Visual Inspection
For electric ovens, observe the bake element during preheating. It should glow evenly across its full length. For gas ovens, observe the igniter to see if it glows promptly and if the gas ignites within 90 seconds. Look for any visible damage to elements, igniters, or wiring.
Step 3: Check the Door Seal
With the oven hot, check for heat escaping around the door. If the gasket is damaged, plan for replacement.
Step 4: Verify the Vents Are Clear
Make sure nothing is blocking the oven vent openings on the cooktop surface.
Step 5: Check Temperature Accuracy
Compare the oven thermometer reading to the set temperature. If there is a significant discrepancy, try recalibrating the oven per the manufacturer’s instructions.
Step 6: Consider the Age and History
If your oven is more than ten to fifteen years old and has never had any components replaced, it is likely that one or more parts are simply worn out from years of use. Elements, igniters, and sensors all have finite lifespans.
Fixes You Can Do Yourself
Several of the common causes of slow oven preheat are within the reach of a handy homeowner.
Replacing a Bake Element
After unplugging the oven or turning off the breaker, remove the screws holding the element to the back wall of the oven. Carefully pull the element forward to access the wiring connectors. Disconnect the wires, note their positions, and connect them to the new element. Secure the new element with the original screws.
Replacing an Igniter
Turn off the gas supply to the oven. Remove the oven racks and the bottom panel. The igniter is usually attached to the burner assembly with one or two screws and connected to the wiring with a plug connector. Remove the old igniter, install the new one, and reassemble. Important: when handling a new igniter, do not touch the element itself with your bare fingers, as oils from your skin can create hot spots that shorten its life.
Replacing a Temperature Sensor
The sensor is mounted with one or two screws at the back of the oven interior. Remove the screws, pull the sensor out slightly, disconnect the wiring connector, and connect the new sensor. Secure it with the screws.
Replacing a Door Gasket
Remove the old gasket by pulling it out of its channel or removing clips. Clean the channel area. Install the new gasket starting at the top of the door and working your way around, pressing it firmly into the channel. Let the oven sit closed for a few hours to let the gasket conform to the door shape before using the oven.
When to Call a Professional
Some oven preheat issues are best left to qualified technicians.
- If you smell gas at any point during troubleshooting (for gas ovens), stop immediately, ventilate the area, and call both your gas company and a repair professional.
- If the control board appears to be the issue, diagnosis and replacement involve working with electronic components and should be handled by someone experienced with oven repairs.
- If the oven’s insulation needs attention, this involves partially disassembling the oven and is not a typical DIY task.
- If you are not comfortable working with electrical wiring or gas connections, professional service is the safe choice.
- If the oven is still under warranty, DIY repairs may void the warranty. Check your warranty terms before opening anything up.
The appliance repair team at Tech Angels handles oven preheat diagnostics regularly and can quickly identify whether you need a simple part replacement or a more involved repair. A professional diagnosis can save you the time and frustration of trial-and-error troubleshooting, especially if the cause is not immediately obvious.
Preventing Slow Preheat Problems
Regular maintenance can help prevent oven preheat issues from developing.
- Keep the oven interior clean. Built-up grease and food residue can insulate the temperature sensor, causing inaccurate readings. It can also create smoke and odors that affect cooking performance.
- Do not line the oven bottom with aluminum foil. Foil can block airflow, reflect heat unevenly, and potentially damage heating elements.
- Inspect the door gasket periodically for wear and replace it if you notice heat escaping.
- Use the self-clean cycle sparingly if your oven has one. While it is effective at removing buildup, the extreme temperatures can stress components like the door lock mechanism, hinges, and even the control board.
- Have your oven inspected as part of a regular appliance maintenance schedule, especially if it is more than eight to ten years old.
Is It Time for a New Oven
Sometimes the slow oven preheat is a symptom of an oven that is reaching the end of its useful life. Here are some factors to consider when deciding between repair and replacement.
Age of the Oven
The average lifespan of an oven is 13 to 15 years for electric models and 15 to 17 years for gas models. If your oven is approaching or past these ages, investing in a major repair may not be the best use of your money.
Cost of Repair vs. Replacement
A general rule of thumb is that if the repair cost exceeds 50 percent of the price of a comparable new oven, replacement is the more economical choice. Simple repairs like element or igniter replacement are well under this threshold, but control board replacements or sealed system issues can push the cost higher.
Energy Efficiency
Newer ovens are more energy-efficient than older models. If your oven is 15 years old or more, a new model will likely use noticeably less energy, which translates to savings on your utility bills over time. In Vancouver, where electricity rates have been rising, the energy savings from a newer, more efficient oven can be meaningful.
Cooking Performance
If slow preheating is just one of several performance issues, such as uneven cooking, temperature inaccuracy, or frequent cycling, the oven may have multiple aging components. Replacing one part at a time becomes an ongoing expense, and a new oven provides reliable performance across all functions.
Final Thoughts
A slow oven preheat is a frustrating problem, but it is almost always diagnosable and fixable. Start with the simplest checks, like inspecting the heating element or observing the igniter, and work your way toward more complex possibilities only if the obvious causes are ruled out. Many of the most common fixes are affordable and within the ability of a reasonably handy homeowner.
The key is not to ignore the problem. A slow oven preheat wastes energy, throws off your cooking times, and often indicates a component that is getting worse over time. Address it now while the fix is simple, rather than waiting until the oven stops working entirely on Thanksgiving evening. Check your oven’s preheat time this week and take action if it is not measuring up.
Related Articles
Explore more appliance care tips from the Tech Angels blog: